I’ve been interested in mosaic welded steel for a long time after watching so many Alec Steele and Will Stelter videos. The possibilities with these patterns are endless, and I have always wanted to try this technique.

Multimaterial patterned crafts exist in many forms: Damascus steel, mokume gane, nerikomi ceramics, stick rock, reticello/merletto glass, and probably countless more.
One of the fundamental building blocks of mosaic patterned Damascus bars is the “C” shape, which is usually done as follows (credit https://www.americanbladesmith.org/community/pattern-welded-blades/w-pattern/):
- Stack up layers of metal sheets, usually with contrasting colours. Diffusion bond or solder the sheets to create a solid bar with layers.
- Forge on the corners of the bar in two stages. This creates the “C” shape pattern oriented at 45 degrees to the edges:
- Reshape the square bar into an octagon
- Continue forging until the octagon becomes a square again
- Forge on the corners in the direction of the C patten. This forms a rectangle with the “C” shape pattern oriented vertically.
People then do further processing after this to create mosaic patterned bars.

I’m attempting to create this fundamental building block using 0.3 mm thickness nickel and copper sheets. They were cut into 5 mm x 40 mm strips using heavy duty scissors. I’m using nickel as a cheap alternative to silver during process development, but eventually I plan to use precious metals that don’t cause skin allergies.

Used 0.5mm stainless steel binding wire to clamp the sheets together for bonding, stacking them up with alternating copper-nickel-copper.

The stackup was soldered with medium silver solder (I ran out of hard). The solder didn’t flow very far along the sheet seams, probably because not enough was used initially. To fill up the sheet seams, the solder wire was pushed directly into the flame, similar to how brazing/TIG rod or plumbing solder would be applied. This was the first time I’ve soldered in this way and it was very satisfying.

Nice glow!

The bar after coming out of the pickle bath and removing the wire.

I filed and buffed the end of the bar and put it in pickle to reveal the nickel-copper layers. The bottom left of the bar has a void at an interface, suggesting the solder did not fill all of the spaces between the layers. To avoid this next time, the sheet surfaces could have been prepared by sanding and degreasing. However, this was skipped to save time because I was expecting delimitation during forging later anyway.
Edit: Looking back at this picture, the bar is not square, I could have calculated the number of sheets more carefully!

Forging the corners started at room temperature, using an aluminium plate as an anvil, and a small hammer. This is a frustratingly underpowered setup, I need more mass!

After a few hammer blows the outer skin delaminated. This was expected because solder did not appear to have flowed under this layer.

Forging was very slow going, and the outer layer continued to have a lot more delamination. I tried heating the bar to red with the propane torch and then working it while hot, and the first few blows did move the metal a lot more. However, it cooled down very quickly due to its size. This technique may work in future with a small bench top furnace/forge.
I switched to using the end of my steel ring mandrel as a small anvil and continued at room temperature. This was a bit awkward but the higher mass improved forging efficiency a lot.
It was challenging to forge the sides square by eye. If the bar parallelogrammed too much, I had to correct the sides using well aimed hammer blows. At first I tried to work the metal with the hammer and anvil faces parallel, but I found that using the edge of the anvil, or the edge of the hammer, was more efficient for drawing out the bar in sections.


After a few hours of getting discouraged by how gnarly and crusty the forging looked, the bar finally turned into a neat almost-square.

I cut both ends flush and buffed them to see the pattern. Neither end looked as I expected it to – I thought the ‘”C” shape would be more pronounced at this stage. Some more delamination is developing, but I’m very happy that the whole bar survived the forging and did not fall apart.


I gave my neighbours a break from the hammering and came back to the bar the next day to execute step 3: resquaring the bar by forging on the corners again, flatting the bar to produce the “C” pattern.


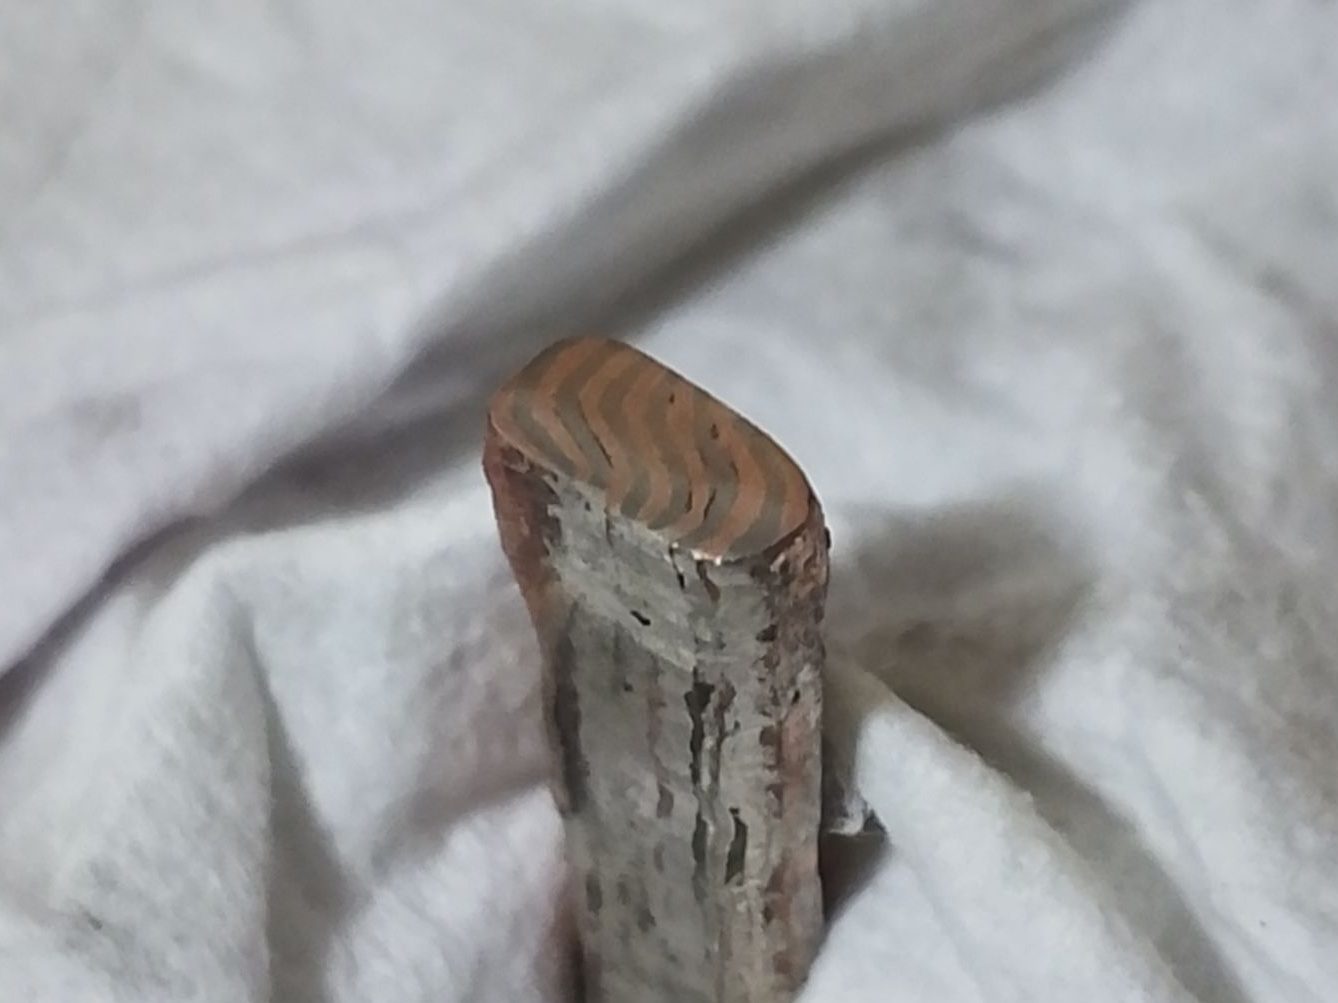
The left column shows that the layers deformed to create a “S” pattern instead of a “C”. This looks pretty, but was not what I expected. This is probably because the pattern was not perfectly at 45 degrees to the bar during the previous step due to inaccurate forging.
The right column does seem to show a “C” pattern! Although, one half of the pattern is somewhere between a “C” and an “S”. There is a major void at this end of the bar. It is surprising how well the bar survived the forging with all of the stretching forces trying to rip it apart.
This forging step went a lot faster with more regular annealing and using the edge of the hammer instead of the flat face, to draw the bar out.
This is the end of the first attempt! I’m really happy at how well it went, even though the pattern wasn’t as “textbook” as I would have liked. Next time I will start to assemble this building block into some mosaic pattern bar. I may have to draw it out further to have enough length to cut and restack it, so this may need to wait until I can get my hands on a rolling mill. A rolling mill should also be quieter so that I can make progress in the evenings – after getting home from work and eating dinner there is hardly any forging time before the late night hammer blows will annoy my neighbours!
Final thoughts and learnings
- Delamination: I’m assuming the thin solder layer itself is cleaving, rather than the nickel/solder bonds or the copper/solder bonds.
- Medium solder is relatively soft and may not be suitable for this application. Hard solder may create solder layers strong enough to survive forging.
- In the future I plan to diffusion bond the nickel and copper instead of soldering, but hoped I could still use soldering as a short term solution to play with patterns.
- Speed: Forging the bar was very slow, and as I plan to do a lot of these mosaic patterns, I want to find a more efficient process. Possible solutions:
- Practice/technique
- Regular annealing or forging hot
- Using the edge of the anvil/hammer
- High-mass hammer and harder/high-mass anvil
- Rolling mill (any excuse to get a new tool)
- Practice/technique
- Pattern symmetry: Some people may like the random unpredictable nature of mosaic patterned multi-metal bars, but I want to learn how to control the pattern as much as possible. I did a lot of origami as a kid – I’m big on geometry and patterns being neat and tidy.
Looking back, the solid soldered bar was not perfectly square, which may have affected the pattern symmetry. In future I could make sure the bar is truly square before progressing to step 2.
Also, the cross sectional pattern looked different at each end of the bar, which is another indicator of inconsistent forging / re-squaring. Practice! - Cold shuts: when resquaring the bar, there are lots of cold shuts at the edges. These could introduce invisible voids in the bar that accumulate throughout the mosaic pattern iterations. For this proof of concept, this doesn’t matter much but it is something to watch moving forward.
- Documentation:
- Taking photos of shiny metal is hard
- Taking in-focus photos is hard
- I’d rather spend money on a rolling mill than a camera so the current photo quality will have to do.
Leave a Reply